Act4Outlook Setup Manual
OUTLOOK FOR ACT
Act! customers demand reliable Outlook integration, but are often frustrated with the limits of the native tools in Act!, and unclear which add-on is best for their needs. Luckily Keystroke makes the top two tools for unmatched reliability and best of breed features - Act4outlook and Act4mail. What’s more, in August 2020 we released Act4outlook v5, which supports both 32 & 64-bit versions of Act! with one installer, and is now compatible with all desktop versions of Act!, v17 and later.
- Act4Outlook Setup Manual
- OUTLOOK FOR ACT
- POST INSTALL CONFIGURATION FOR OUTLOOK
- CONFIGURING ACT4OUTLOOK SETTINGS
- CONFIGURING ACT4OUTLOOK HISTORY RECORDING
- CONFIGURING ACT4OUTLOOK UPDATE SETTINGS
- CONFIGURING ACT4OUTLOOK LOG SETTINGS
- CONFIGURING ACT4OUTLOOK FIELD MAPPING
- CONFIGURING ACT4OUTLOOK ACTIVITY SETTINGS
- CONFIGURING ACT4OUTLOOK HISTORY SETTINGS
- CONFIGURING ACT4OUTLOOK CONTACT EXCLUSIONS
- SKIN SELECTOR
- FEATURES TOUR
- QUICK ATTACH EMAIL TO ACT!
- SEND EMAIL TO ACT!
- CREATE CONTACT IN ACT!
- CREATE ACTIVITY IN ACT!
- COMPOSING NEW EMAILS, REPLIES OR FORWARDS
- FROM OUTLOOK CONTACTS - SEND CONTACT TO ACT!
- SEND MULTIPLE CONTACTS TO ACT!
- LINK CONTACTS TO
- FROM CALENDAR VIEW
- SEND ACTIVITY TO ACT
- SEND MULTIPLE ACTIVITIES TO ACT!
- THE NEW ACT4OUTLOOOK V7 NOW INCLUDES THE FOLLOWING FEATURE IMPROVEMENTS:
SETUP PROCESS
DOWNLOAD THE ACT4OUTLOOK INSTALLER FROM http://act4work.com/files/a4o/act4outlookinstaller.exe 1
CLOSE ACT! AND OUTLOOK
DOUBLE-CLICK ON THE ACT4OUTLOOK INSTALLER FILE TO INSTALL THE PROGRAM 2
DON’T CHANGE THE DEFAULT DESTINATION FOLDER C:\Program Files (x86)\Act4Work\Act4Outlook
ONCE INSTALLED THE ACT4WORK UPDATER WILL LAUNCH TO CHECK TO SEE IF THERE IS A MORE CURRENT VERSION OF ACT4OUTLOOK. IF THERE IS AN UPDATE AVAILABLE, CLICK NEXT THEN CLICK FINISH, OTHERWISE CLICK OK.
1 During download you may get a security warning from Microsoft Windows saying the program may be unsafe to run. Continue with the download anyway, taking care to download first instead of trying to run from the download link. Microsoft may display addition warnings. Click Actions, and then More Options, and Run Anyway.
2 If User Access Control is enabled, you will receive a security prompt to confirm the installation. Note: Some Anti-Virus programs may attempt to intercept the installation of Act4outlook application. If yours is one of them, please disable the Anti-Virus program or disable real- time scanning, and then resume the installation of Act4outlook.
POST INSTALL CONFIGURATION FOR OUTLOOK
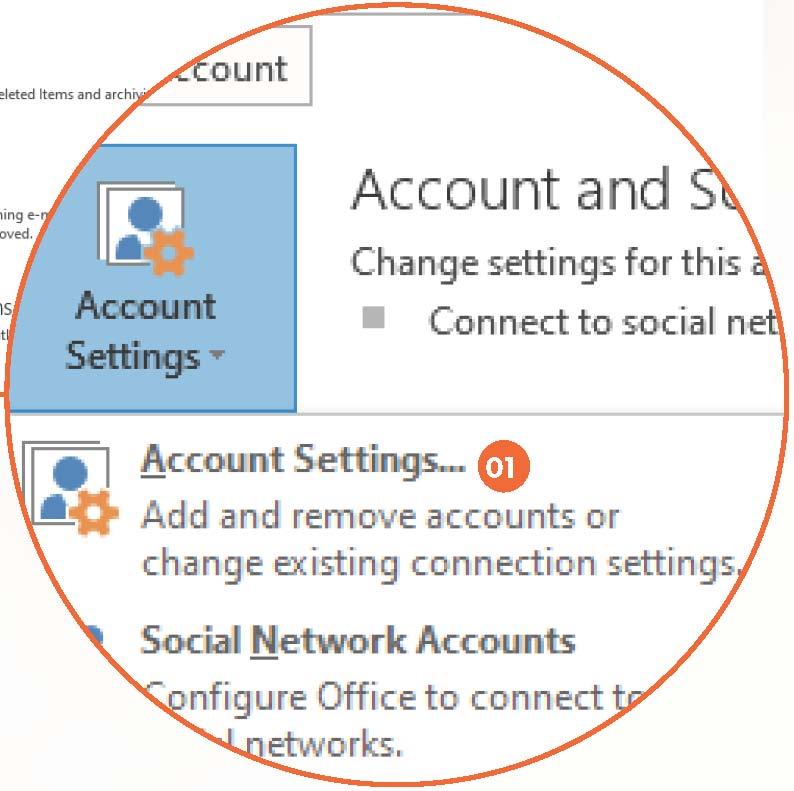
- After completing the installation, launch Outlook. Once loaded, click on File from the top pull down menu, and then Account Settings. You will be prompted to click on Account Settings again before the settings screen displays.

- Click on the Address Book tab on the furthest tab to the right (1), and you should see Outlook Address Book, and Act! Address Book.
- Select the Act! Address Book nd then click on Remove
- just above it. Once removed, click Close, and restart Outlook.
Once Outlook has reloaded, you should be safe to launch your Act! and begin the configuration of Act4outlook.

IMPORTANT NOTE: ALL THE CONFIGURATION SETTINGS FOR ACT4OUTLOOK CAN BE FOUND IN OUTLOOK, NOT ACT!. SEE CONFIGURING ACT4OUTLOOK SETTINGS GUIDE AT KB.ACT4WORK.COM FOR MORE DETAILS.
CONFIGURING ACT4OUTLOOK SETTINGS

- ACT4Outlook Settings - After installation click on ACT4Outlook Settings button found in the top right side of the Outlook window on the Home tab.
- Act Database - Fill in the database login information and click Log in:
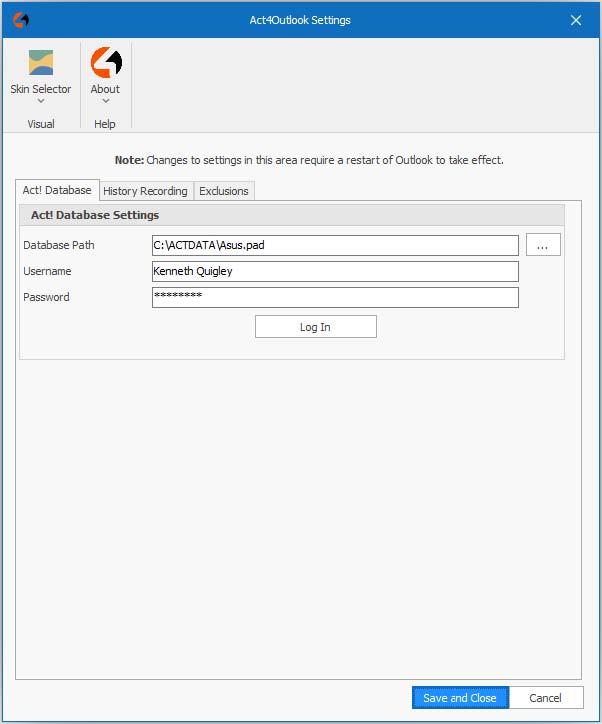
*IMPORTANT NOTE: IN ORDER TO FIND YOUR ACT DATABASE PATH, PLEASE REFER TO THE FOLLOWING ARTICLE: ARTICLE ID: 1007
CONFIGURING ACT4OUTLOOK HISTORY RECORDING
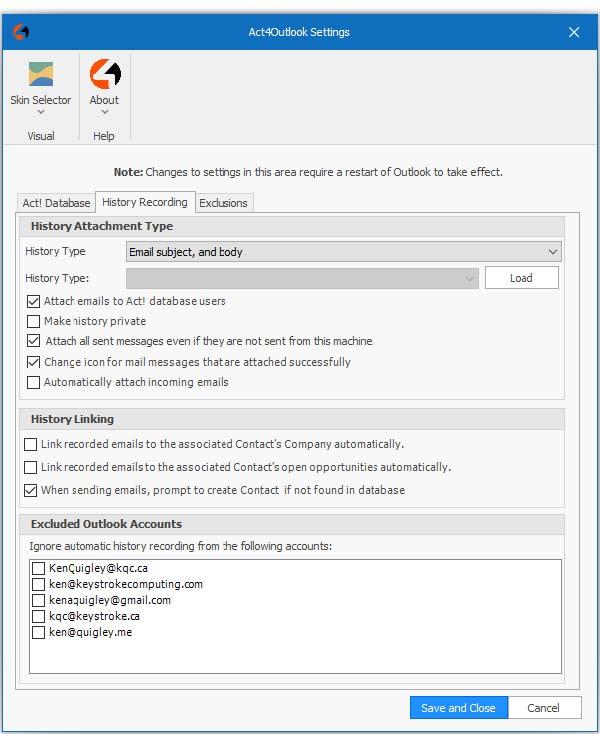
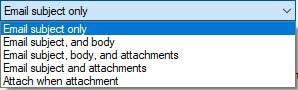
- History Recording - Click the History Recording tab to change settings for how emails will be recorded in Act!
- History Type:
- Attach emails to Act! database users Make history private
- Attach all Sent Messages even if they are not sent from this machine (Inbound Email History Settings).
- Automatically attach incoming emails (This option will match incoming email addresses in the From field to ANY Email address field in the database NOT just the primary email address).
Ignore Senders Domain (If incoming emails are being recorded to you can ignore domain names to exclude them from being automatically attached to contact records).
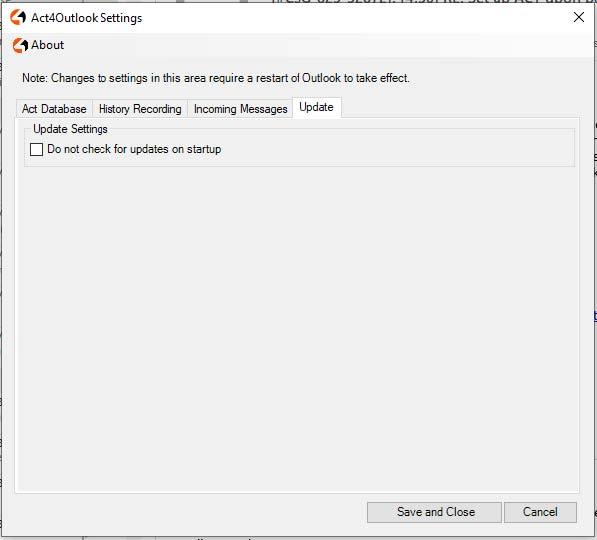
CONFIGURING ACT4OUTLOOK UPDATE SETTINGS
- Update Tab: by default this button is unchecked so you will be notified of any updates
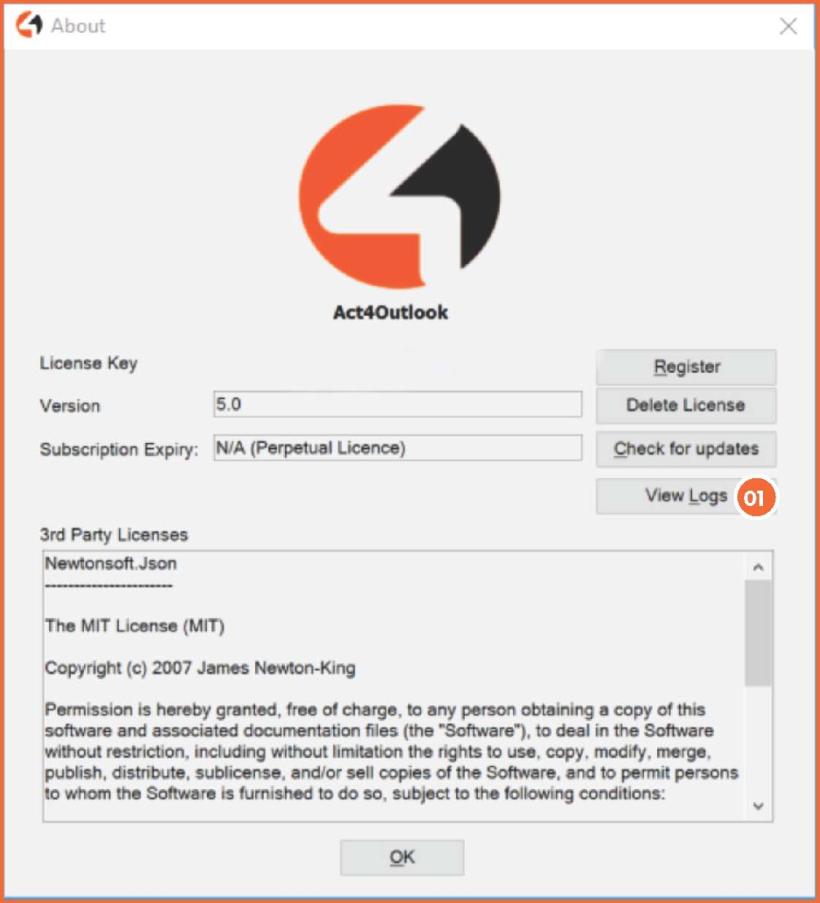
CONFIGURING ACT4OUTLOOK LOG SETTINGS
- View Logs button on the About page - This is used by Tech Support if you are asked to send the logs for trouble shooting: Email Logs to: service@kqc.ca
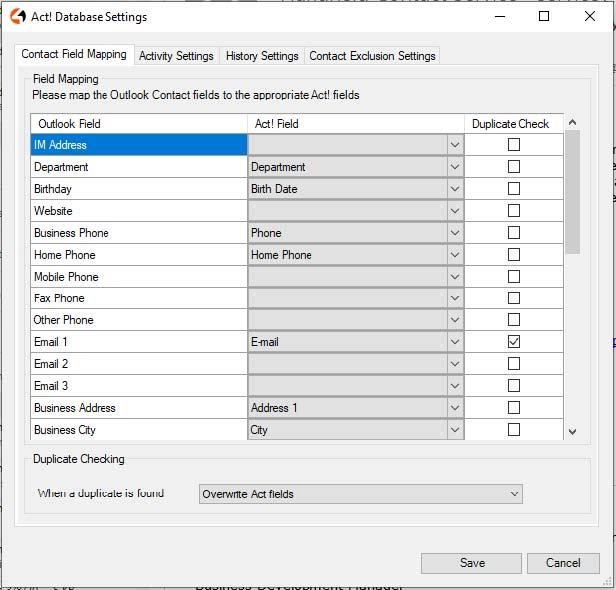
CONFIGURING ACT4OUTLOOK FIELD MAPPING
- Act! Database Settings: To configure ACT4Outlook Database Settings click on ACT! Database Settings button found at the top right side of the Outlook window on the Home tab.

- Contact Field Mapping: Choose which fields from your Outlook will match to fields in Act. This is useful if you have used Outlook as a CRM in the past and have recorded information in Outlook for your contacts. Also used for duplicate checking when sending Contacts to Act!
CONFIGURING ACT4OUTLOOK ACTIVITY SETTINGS
- Activity Settings: Set your Default Activity Type for creating activities in Act from Emails sent from your In-box

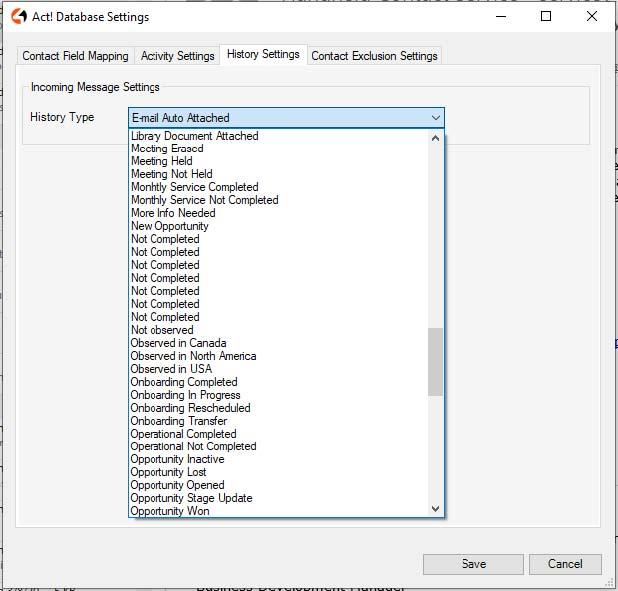
CONFIGURING ACT4OUTLOOK HISTORY SETTINGS
- History Settings: For incoming Emails automatically attached to a contact record, you can set the default History type
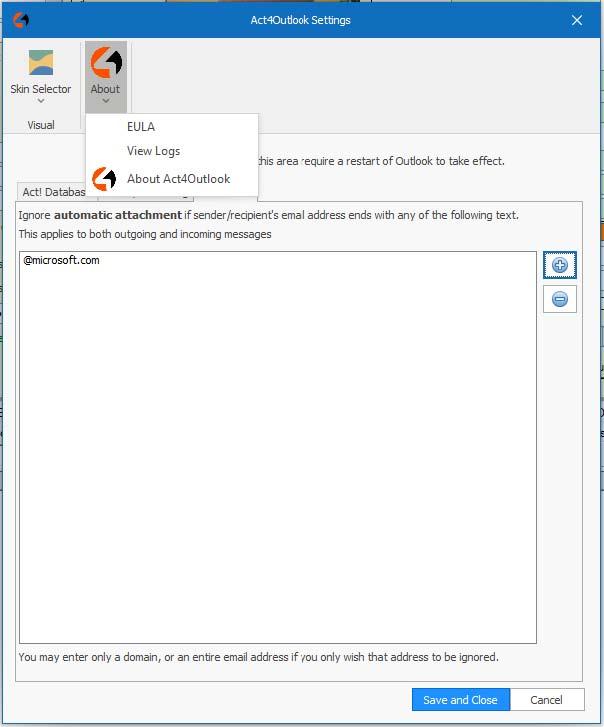
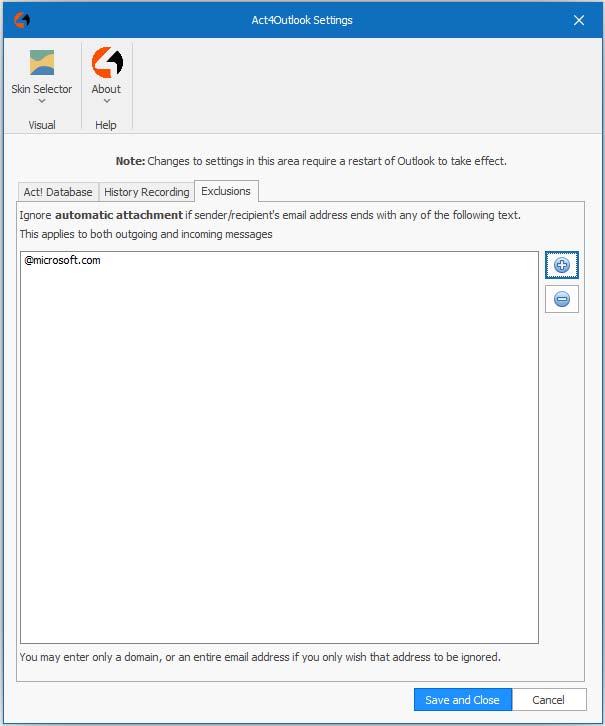
CONFIGURING ACT4OUTLOOK CONTACT EXCLUSIONS
- Contact Exclusion Settings: You can ignore the history recording based upon a field value
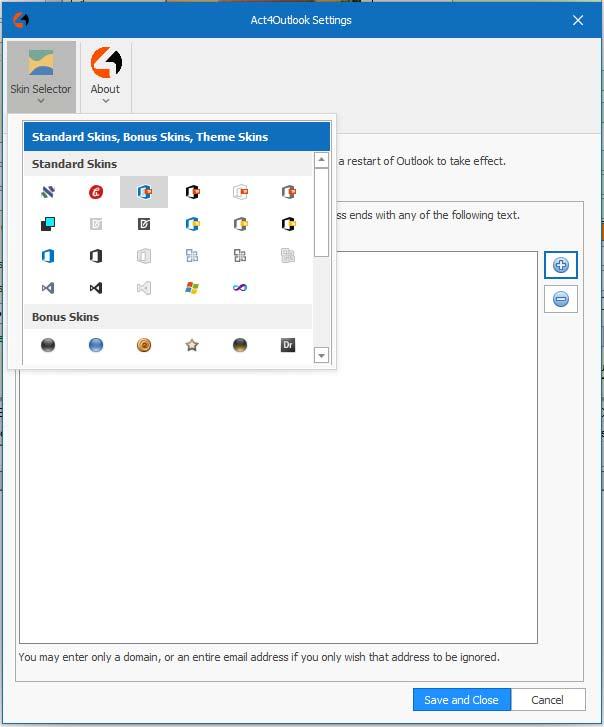
SKIN SELECTOR
You can change the software skin
FEATURES TOUR
- ACT4Outlook - Right Click Menu - Right click on an email in Outlook will present you with several NEW options.
- Go To Contact - This option requires ACT to be open and will show you the contact in your act database that has a matching email.
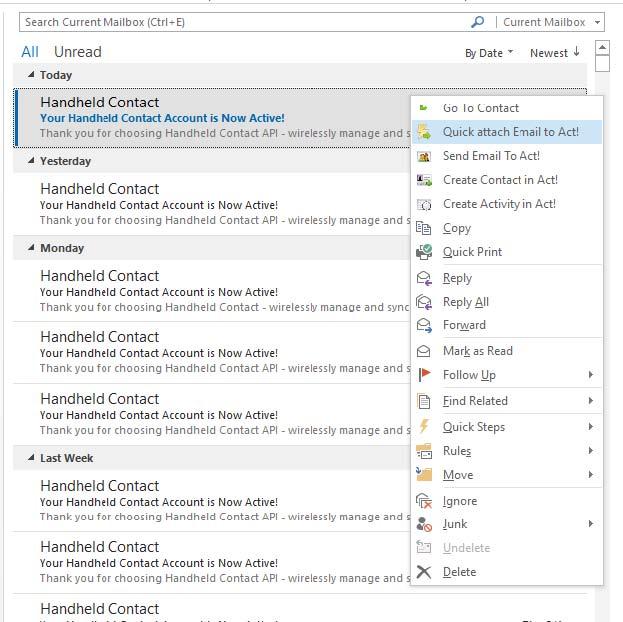
IMPORTANT NOTE: ACT4OUTLOOK WILL SEARCH ANY EMAIL FIELD YOU HAVE CREATED IN YOUR DATABASE, NOT JUST THE PRIMARY EMAIL.
- ACT4Outlook - Right Click Menu - Right click on an email in Outlook will present you with several NEW options.
- Go To Contact - This option requires ACT to be open and will show you the contact in your act database that has a matching email.

QUICK ATTACH EMAIL TO ACT!
Apart from the emails that are automatically attached to ACT, you can manually attach emails using Quick Attach:
- From the Inbox: Quick Attach Email to Act! > will attach the email to the ACT! contact found in the FROM field. Note: Quick Attach will search ANY email field for a match. Once found Click OK.
- From the Sent Folder: Quick Attach Email to Act! > will attach the email to the ACT! contact found in the TO and CC fields. Note: Quick Attach will search ANY email field for a match. Once found Click OK.
Note: To save time, you can select multiple emails at one time to quick attach to contacts.
If a Contact is not found you will be able to Create, Skip or Skip All. (See create contact below)
SEND EMAIL TO ACT!
Send Email to Act! will present you with a new window which allows you to manually select the:
- Company
- Group
- Opportunity or Contact to attach the email to.
- You can select multiple options here and attach to as many as you need.
- Choose the History Type when attaching.
- Once you define who the Email will be attached to click Send.
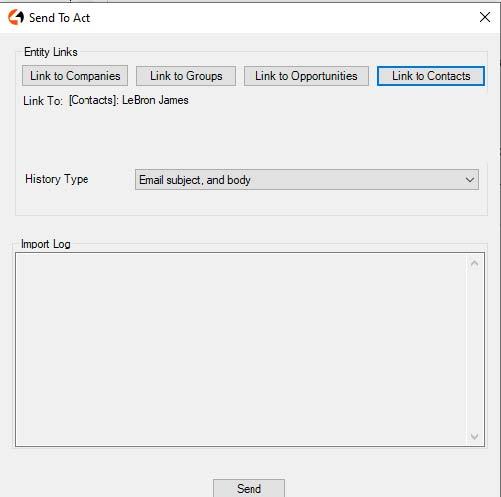
Using the buttons along the top you will be presented with a list to select from and clicking send will then attach it to your selections. Contacts will be matched with ANY email address field in Act and are automatically added to this list.

CREATE CONTACT IN ACT!
The first time you launch => Create Contact in Act! you will see a list of ALL available fields in your Act Database.
Click the => Settings button to limit the list and => Select the Fields (Screen Shot below) that you want to use when creating a Contact in ACT.

Email address and Contact Name are grabbed automatically and all available ACT fields are displayed.
Once your field list is defined, you will only see the fields you want to complete when creating a new Contact.

CREATE ACTIVITY IN ACT!
This option gives you the ability to create an activity directly from the email and choose what the activity is linked to. Contacts with matching email addresses in Act are automatically added to this list.

COMPOSING NEW EMAILS, REPLIES OR FORWARDS
ACT4Outlook gives you two new options when composing emails:

- The traditional Send button (or using CTRL+Enter) Will automatically attach the email based on your preferences.
- Send and link Will send the email and present you with a dialogue box allowing you to choose where the email is attached just like the Send Email To Act! dialogue.
- Send without attaching Will send the email without attaching the email to the contact in Act!.
FROM OUTLOOK CONTACTS - SEND CONTACT TO ACT!
Within the Outlook Contacts section, ACT4Outlook allows you to send contacts to Act.
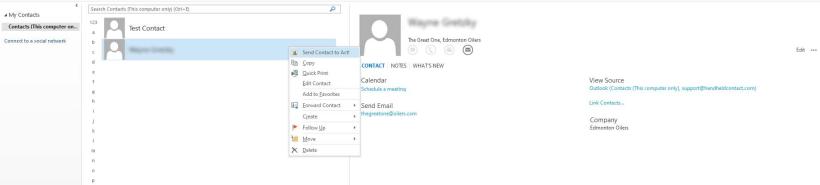
There is no dialogue or user confirmation. Contacts will be sent using the mapping setup in the Configuring ACT4Outlook section.
SEND MULTIPLE CONTACTS TO ACT!
From the List view in Outlook Contacts you can select multiple contacts to send to Act! at one time.
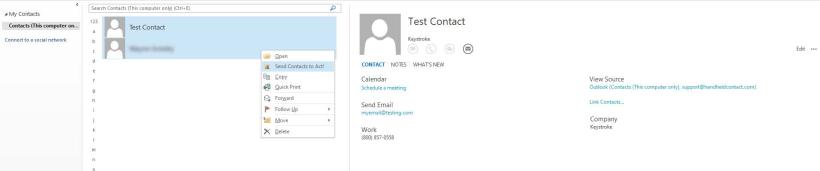
Highlight multiple contacts, Right Click => Send Contacts to Act!
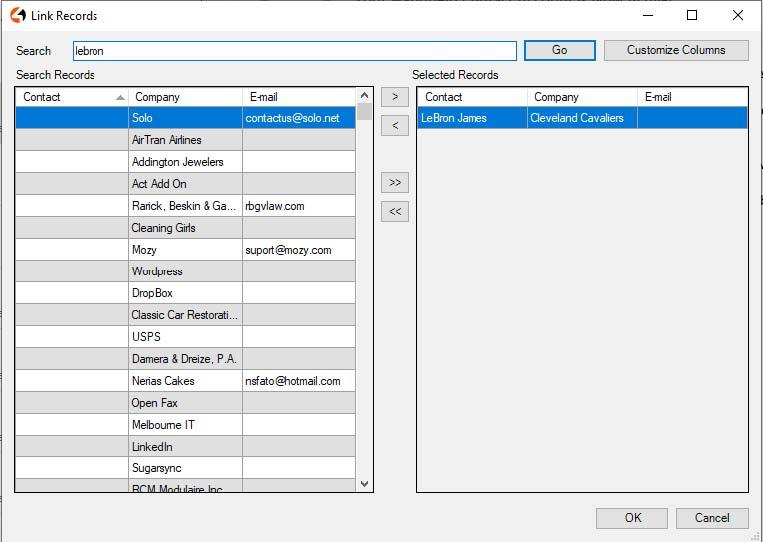
LINK CONTACTS TO
A dialogue box appears to allow you to link the contacts to Companies, Groups and Opportunities when sending them to Act!

Click => Send
Click => Ok
FROM CALENDAR VIEW
From the Outlook Calendar ACT4Outlook allows you to send calendar entries to Act!

The activity will be sent to Act and where possible, attach to a contact with the matching email address. If the activity was previously sent and has been updated it will update the one in Act, not create a duplicate.
SEND ACTIVITY TO ACT
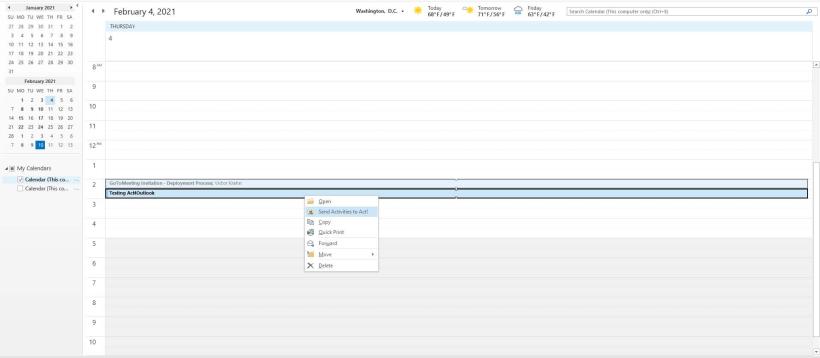
From the Calendar in Outlook, if you have activities you have recorded in your Outlook Calendar you can send them to Act with a Right Click of the mouse.

SEND MULTIPLE ACTIVITIES TO ACT!
If you have Multiple Activities you would like to send to Act you can do the same thing with the List View in the Calendar and send Multiple Activities to Act.
The best just got better. The top-selling Act! addon of all time has now been improved with MANY new customer-requested features, and is the biggest rewrite in the product’s history.
Rest assured, Act4outlook still includes superfast incoming & outcoming History recording; bi-directional copying of contacts, activities, & tasks; support for creating contacts & activities from emails, as well as the ability to create lookups in Act! from one or more emails.
THE NEW ACT4OUTLOOOK V7 NOW INCLUDES THE FOLLOWING FEATURE IMPROVEMENTS:
- One-way Contact sync: The user will be able to set a direction for contacts to be pushed, from Act! to Outlook or Outlook to Act!, and this new version will implement these pushes on a scheduled basis (as frequently as every 5-minutes). Unlike Act!, our addon currently has the ability to push one or more contacts manually in either direction, so a user simply sets the direction they’d like contacts to be pushed automatically, and they can easily push the other way manually.
o This feature is enabled under the “Sync Settings” toolbar option in Outlook
o Once this is clicked, you will see three Tabs – Activity Sync, Contact Sync, and Clear Outlook Data
o Under Contact Sync you have the option to configure these settings starting with the checkbox that enables the sync process. Once this is enabled, you need to complete the remainder of the configurations, and then and then restart Outlook to start this new configuration
o Contact Sync Options
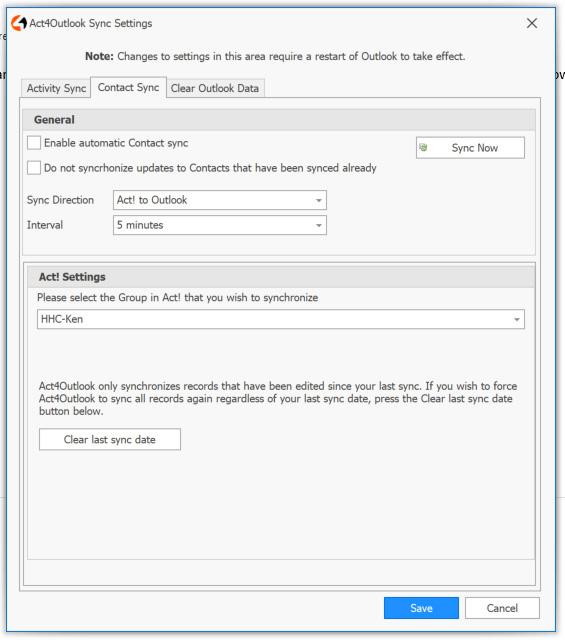
- Do not synchronize updates to Contacts already synced: By default, Contact sync is enabled to check for updates so the destination will receive changes from the source Address Book
- Sync Direction: Self-explanatory, as you need to determine which address book receives the most updates by the users, and which direction these should be sent
- Interval: what frequency should these address books changes be reconciled
- Act! Settings > Group: Like Handheld Contact, Act4outlook allows you to narrow the contacts you sync to Outlook to a specific group. This is useful for large databases filled with marketing prospects that are not needed in Outlook.
- Clear Last Sync: by default, Address book syncing only pushes new and updated contacts. If you’d like to clear these settings and start from scratch, click this button. Clearing this will not create duplicates, but it will slow down the process because it will go from checking for updates since the last sync date, to checking all contacts.
- Sync Now: by default the pushing of address book data is on a schedule, but this button allows you to trigger it on demand. This is useful for first syncs, or when there are a lot of updates to push.
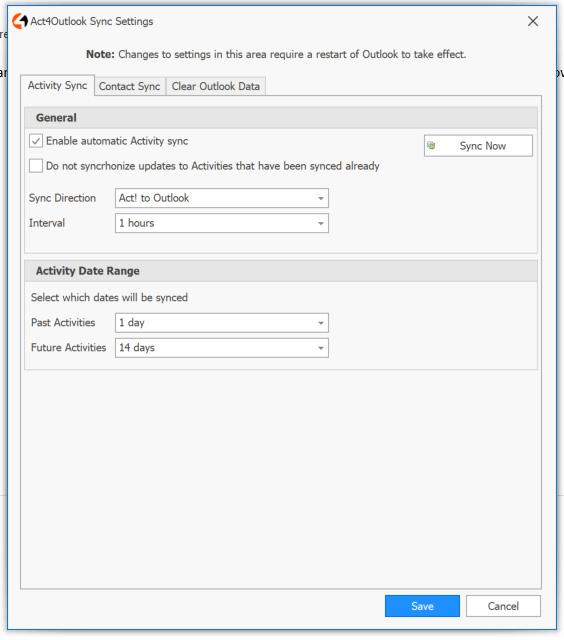
- One-way Calendar sync: Much like the Contact sync described above, the user can set a direction to push activities automatically and leave the rest for manual pushes. We expect this feature to be great for people who create appointments or accept invites on their phones, or those who need their personal calendar to reflect their Act! calendar, as well.
o This option is enabled under the Activity sync tab
o Under Activity Sync you have the option to configure these settings starting with the checkbox that enables the sync process. Once this is enabled, you need to complete the remainder of the configurations, and then and then restart Outlook to start this new configuration
o Do not synchronize updates to Activities already synced: By default, Activity sync is enabled to check for updates so the destination will receive changes from the source Calendar
o Sync Direction: Self-explanatory, as you need to determine which calendar receives the most updates by the users, and which direction these should be sent
o Interval: what frequency should these calendar changes be reconciled
o Activity Date Range
• These drop downs allow you to select the data range in the source calendars to be synced to the destination calendar. Default is one-day back and one-day forward, but we recommend one-week back, and up to four weeks forward.
• Please note recurring activities in Act! are sent to Outlook as non-recurring, and vice versa. Changing the recurrence settings in the destination calendar can create duplicate events.
o Sync Now: by default the pushing of calendar data is on a schedule, but this button allows you to trigger it on demand. This is useful for first syncs, or when there are a lot of updates to push.
- One-way push buttons for both: If you are new to Act! and you want to create an Act! database from your Outlook, Act4outlook makes it easy. There are now on-demand push buttons to move your contacts and/or calendar from Outlook to Act!.
- Clear Outlook Contacts & Calendar: if your Outlook address book and calendar has become polluted over time with duplicates and dated content, you can now clear either one to start fresh.
o These options are found under the “Clear Outlook Data” tab.
- Contacts in the main folder are wiped in this process, but contacts nested in sub folders are not
- History Suppression: the ability to suppress History recording when sending emails to specific domains (currently this is only supported with inbound emails)
- No matching contact alert: add a popup if the email address you are sending to is not in the database, and then present an option to create that new contact or attach to a different one.
- Activity type selection: When creating an activity from email, we’ve added a preference to set a specific activity type (currently it defaults to Call)
- Location field visibility: When creating an activity from email, the Location field is currently greyed out unless “Schedule Meeting in Outlook” is selected. This option will be enabled by default now.
- Activity Attachments: When creating an activity from an email, you can now attach the email to the activity (including any attachments on the email).
Act4outlook v7 still supports 32 & 64-bit versions of Office, and is compatible with all versions of Act! (Pro & Premium) back to v18.